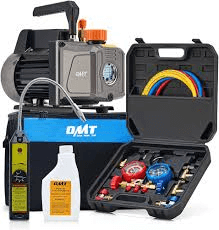
The Orion Motor Tech AC gauges are an essential tool for diagnosing and maintaining automotive air conditioning (AC) systems. These gauges help measure the pressure in the system and allow you to add refrigerant or evacuate the system. If you’re unfamiliar with how to use them, this guide will walk you through the basic steps.
Step-by-Step Guide to Using Orion Motor Tech AC Gauges
1. Familiarize Yourself with the Components
Orion Motor Tech AC gauge sets typically include:
- Gauge manifold: Contains two gauges – one for low pressure (blue) and one for high pressure (red).
- Hoses: The set includes three hoses: blue (low pressure), red (high pressure), and yellow (service).
- Couplers: These attach the hoses to your vehicle’s AC system.
- Sight glass: Allows you to observe the flow of refrigerant.
2. Ensure Safety Precautions
Before working with any automotive AC system:
- Wear safety goggles and gloves to protect yourself from refrigerant, which can cause frostbite if it comes in contact with your skin.
- Turn off the vehicle and ensure the AC system is not running while connecting the gauges.
- Read the vehicle’s manual for specific refrigerant type and safety precautions.
3. Locate the AC Service Ports
Locate the low-pressure and high-pressure service ports on your vehicle’s AC system. These ports are typically found near the compressor or along the refrigerant lines. They are usually marked with an “L” (for low pressure) and an “H” (for high pressure).
4. Connect the Hoses
Now that you’ve located the service ports, connect the hoses from the gauge manifold set as follows:
- Blue hose: Connect the low-pressure hose (blue) to the low-pressure port on the vehicle.
- Red hose: Connect the high-pressure hose (red) to the high-pressure port.
- Yellow hose: The yellow hose is the service hose, used for adding refrigerant or evacuating the system. Leave this hose connected to the gauge manifold, and connect the other end to the refrigerant can or vacuum pump, depending on your procedure.
5. Read the Gauges
Once the hoses are connected, start the vehicle and turn the AC system on maximum. Allow the system to run for a few minutes. The gauges will begin to show readings. Here’s what they mean:
- Low-pressure side (blue gauge): For a properly functioning system, the low-pressure gauge should read between 25-40 psi.
- High-pressure side (red gauge): The high-pressure gauge should read between 200-300 psi depending on the ambient temperature.
6. Diagnose the AC System
- Low pressure, low reading: This may indicate low refrigerant levels or a system leak.
- Low pressure, high reading: This could be due to a blockage in the system.
- High pressure, high reading: This may suggest overcharging or a problem with the AC compressor.
7. Add Refrigerant or Evacuate the System
If the system is low on refrigerant, you can add refrigerant using the yellow service hose:
- Attach the yellow hose to a can of refrigerant.
- Open the valve on the can and slowly allow refrigerant to enter the low-pressure side. Watch the gauges carefully to avoid overcharging. You should only add refrigerant until the low-pressure gauge shows the appropriate level.
If you’re evacuating the system, connect the yellow hose to a vacuum pump, turn on the pump, and allow it to remove all air and moisture from the system.
8. Disconnect the Hoses
Once you’ve completed the procedure, turn off the vehicle and the AC system. Carefully disconnect the hoses from the service ports. Make sure to replace the service port caps on both the high-pressure and low-pressure sides to keep dirt and debris out of the system.
Conclusion
Using the Orion Motor Tech AC gauges is a straightforward process, but it requires attention to detail and safety precautions. By following these steps, you can accurately measure your vehicle’s AC pressure, diagnose potential issues, and recharge or evacuate the system as needed.
External Resources:

